
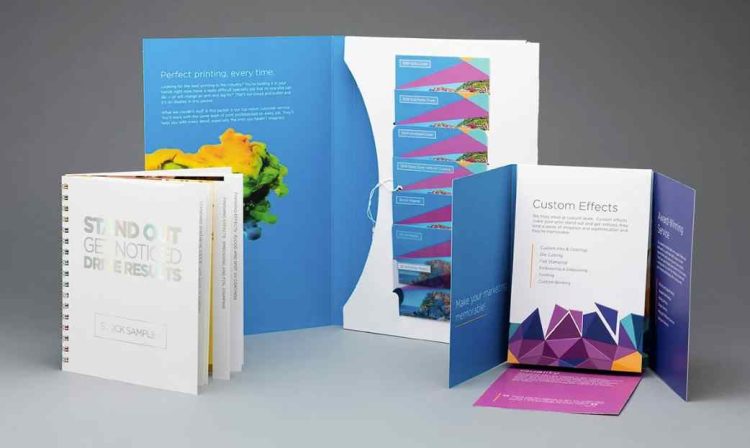
In an increasingly digital world, tangible print collateral remains one of the most reliable ways for businesses to communicate with clients, streamline internal workflows, and distribute product information. Physical documents—such as sales brochures, operational manuals, presentation folders, and business forms—provide a tactile experience that digital screens cannot match. However, poorly planned print projects often suffer from late deliveries, budget overruns, or formatting errors that compromise quality.
Managing a commercial print project from initial concept to final delivery requires a structured approach. When evaluating paper stocks, binding mechanisms, turnaround schedules, and pre-press prep techniques across professional business workflows, referencing technical guides on commercial print services from AlphaGraphics Crystal Lake offers a helpful baseline for comparing paper weights, folding styles, and production methods. Understanding the technical fundamentals of commercial printing empowers organizations to produce sharp, cost-effective print assets on every project.
Step 1: Matching Paper Stock and Finishes to Purpose
The paper sheet you select plays a major role in how recipients perceive your message. Matching paper weight and texture to the document’s function ensures both durability and value.
Understanding Paper Weight Categories
- Bond / Writing Paper (20 lb to 28 lb): Standard lightweight paper ideal for everyday letterhead, internal memos, invoices, and multi-page transactional documents.
- Text Stock (70 lb to 100 lb): Flexible, high-quality sheet commonly used for full-color brochures, flyer inserts, booklet pages, and poster prints.
- Cover Stock (80 lb to 120 lb): Rigid, heavy cardstock designed for business cards, presentation covers, postcard mailers, and door hangers.
Selecting Paper Coatings and Finishes
- Uncoated Finish: Smooth, non-reflective surface that absorbs ink easily. Ideal for materials that need to be written on with ballpoint pens or pencils, such as forms or workbooks.
- Gloss Finish: Shiny coating that enhances color saturation and contrast, making photos and graphic illustrations pop on marketing brochures and catalogs.
- Matte / Satin Finish: Provides a soft, non-glare surface that makes long blocks of text easy to read under bright office lighting.
Step 2: Choosing Folding Configurations for Marketing Collateral
Selecting the right fold for your printed brochure or flyer dictates how information unfolds for the reader, creating a logical reading sequence.
Common Commercial Folding Options
- Half-Fold (Single Fold): Folds a sheet in half to create four distinct panels. Perfect for simple menus, event programs, and basic sales sheets.
- Tri-Fold (C-Fold): Folds both outer panels inward over a center section. Highly compact, making it the standard choice for rack cards, direct mail enclosures, and service menus.
- Z-Fold: Folds panels in alternating directions like an accordion. Works exceptionally well for step-by-step instructional guides or multi-language documents.
- Gate-Fold: Outer panels meet in the center and open outward like doors, making it ideal for high-impact visual presentations or product announcements.
Step 3: Preparing Artwork for High-Speed Commercial Presses
Converting digital designs into physical print requires strict technical formatting to ensure colors render accurately and text remains sharp.
Critical Pre-Press Formatting Rules
- Resolution Settings: Set all embedded raster images to 300 DPI (dots per inch) at actual physical size to prevent blurry or pixelated graphics.
- CMYK Color Conversion: Convert all RGB screen colors to the CMYK (Cyan, Magenta, Yellow, Black) color spectrum to prevent unexpected color shifts during production.
- Bleed and Trim Boundaries: Include a 0.125-inch bleed around all artwork edges and keep critical text at least 0.125 inches inside the trim line to avoid white edges after cutting.
- Font Outlining: Convert all typography into vector outlines to ensure fonts render correctly even if the print facility does not have your specific typeface installed.
Step 4: Streamlining Production with Variable Data Printing
Modern commercial printing extends far beyond static runs. Variable Data Printing (VDP) allows organizations to customize individual pieces within a single press run automatically.
Practical Applications of VDP
- Targeted Direct Mailers: Swap out recipient names, promotional offers, and localized images based on demographic data to increase response rates.
- Personalized Event Invitations: Print custom guest names, seating arrangements, and personalized RSVP codes directly onto cards without stopping the press.
- Sequential Numbering: Automatically print unique tracking codes, invoice numbers, or membership IDs on business forms and event tickets.
Step 5: Final Production Quality Assurance Checklist
Following a pre-flight checklist before submitting final artwork files saves valuable time and prevents costly reprinting delays.
- [ ] Verify Physical Dimensions: Ensure document dimensions match the exact trim size required for the finished product.
- [ ] Confirm 300 DPI Resolution: Inspect all photos to verify they meet high-resolution print standards.
- [ ] Check Bleeds and Margins: Verify that background colors extend to the bleed line and text sits within safe margins.
- [ ] Proofread Copy Thoroughly: Check all phone numbers, web addresses, prices, and dates before approving files for press run.
- [ ] Request a Physical Proof: Review a printed proof sheet to confirm color accuracy, paper weight, and fold alignment before full production begins.